Home > Blog > 2011

All Posts From : 2011

Tips For Umbraco Developers

I've been working with Umbraco for a while now, and I've done a fair bit of work that's involved creating some quite complex extensions for the Umbraco back office, from DataTypes, through to whole new sections.

I've learnt a lot as I've gone along, and thought I'd share some of the tips for writing extensions for Umbraco! Hopefully some of these will help others avoid some of the mistakes I've made, or save them hours of research.

1. Don't Customize the Core Unless You Have To

Only modify the core if you absolutely have to. Early on I extended Umbraco by modifying the core code itself rather than using the event models etc. This was great, until I had to perform an upgrade. At which point I had to re-apply my updates to the new source, rebuild and re-test. Ouch.

Using the event models and the API, you can code extensions that are easy to re-use and that should carry on working, even after an Umbraco upgrade!

2. When Coding Datatypes, Don't Rely on the HttpContext

DataTypes can be called by events that don't have an HttpContext, like the timed publisher. In these cases they'll throw a null reference error, as the HttpContext is not available. Use non context versions of functions wherever possible!

3. When Coding Publish Event Handlers, Don't Rely on the HttpContext

Publish events can occur outside of the HttpContext. If your publish event handler relies on the HttpContext, it will fail when you try and use the timed publish feature of Umbraco. The biggest culprit I've seen for this is using HttpContext.Current.Server.MapPath, which will be null when called through the timed publisher.

You can map the path using HostingEnvironment.MapPath instead. For other code that relies on HttpContext, put in null checks and default values in case there is no HttpContext, and your handlers should work on normal and timed publish!

4. When Creating New CMS Pages, Inherit From UmbracoEnsuredPage

If you're creating new pages for the back office, you want to make sure that those pages are only visisble to users who have logged in through the CMS. The easiest way to do this, is to make sure that your pages inherit from umbraco.BasePages.UmbracoEnsuredPage instead of the usual System.Web.UI.Page.

This will make your page unavailable to non-logged in users, and will also enable you to hook into your page using the Umbraco event model!

5. Don't Be Afraid To Grub Through Code

One of the biggest ways I learnt was to grub through other people's code. Want to make CMS pages that look like the Umbraco ones, but not sure how to do it? Easy, grabthe source from codeplex and have a look at how it's done! Want to know how your favourite uComponents DataType works? Go look at the source and find out. The more you look, the more you'll learn about how the core works, and the ways that you can interact with it.

Hopefully (time permitting) I'm going to start a series of step by step tutorials on how to do some common stuff with the Umbraco Event models and API, concentrating particularly on the back office! Some of the things I'm hoping to cover are creating back office pages, using Umbraco UI elements, working with DataTypes, and using the event model to interact with the back office!
Sick of Over-engineered Sites!

As a freelancer, I get to work for a lot of different companies and agencies. Which means I spend a lot of time looking at other people's code, whether they be inhouse teams, other freelancers, or folk who used to work there but have sinced moved on.

I find it quite interesting, and over the years I've seen code that's made me weep in awe, and code that's made me claw my eyes out in pure horror. But one of the things I really LOATHE is sites that are massively over-engineered for what they do.

I'll take a site I looked at recently. It's a small (sub 50 page) mobile site, which is almost all just plain text, written in MVC2. The solution for the site is split into 7 projects, uses nHibernate, has all the controllers and views split into separate projects (as well as the models, data access and a couple of generic function projects), and then the admin section of the site is a web forms project!

I'm all for separation of concerns and keeping code portable, but REALLY? 7 projects for a simple site? There's quite a bit of code in there as well, most of which is to do with the separation of the concerns and things like data access, mapping for nHibernate and the like. I'm sure it all made perfect sense to the original developer, but to someone going into it fresh, my initial reaction is one of "why the hell is this simple site done like this? Making changes are going to be pretty time consuming.".

I like to think I use the right tools for the job, and for something like this, I'd probably use either Umbraco, or Perch. I don't really see the point in putting in the amount of effort that must have been involved in setting this bad boy up and testing it, when something much simpler would be far better suited to the task.

It's like the developer wanted to make life difficult for themselves and those who came after.

While it might seem like a cool idea to go crazy with all the latest dev methodologies, and to separate everything out so that you can swap out almost any aspect of the site code, in actualy reality, for a project like this, you won't ever need to.

Another example is a site I worked on a couple of years ago, which was for a car sales company. The site had no transactional functionality, just a searchable list of used cars that you could email sales reps about, and a bunch of content managed pages. It was coded in the style of an ultra complex banking app. Trying to follow the code was a full time job, and what looked like simple function calls would turn out to be extraordinarily complex. I eventually figured out how all the important stuff worked, but noted that most of the people who had worked on the site since the original developer hadn't. In most cases, they'd just written their own code to do the same thing as the overly complex code, and used that instead. Which resulted in as many as 5 different ways of doing the same thing, all of which where used on the site in different places.

It made making changes an absolute nightmare. You'd think you'd changed something, only to discover that one page on the site called something completely different that did the same thing as the function you'd just changed. A list of changes that would have taken maybe two days on any sensible site ended up taking over a week on this system due to its crazy over-engineering!

Again, for this site, I'd have used a decent CMS system, and then written extensions to do the car search part. In fact that was something that WAS done to the site eventually (not by me, it was moved to Drupal/PHP) It's now remarkably trivial to make changes to the site, especially compared to the original monstrosity.......

The moral of the story? Use the right tools for the job, please! Remember that other people may have to work on the site, and that if you use methodolgoes and technologies that make it easy for them to do so, you'll be saving both time AND money in the long run. And please, pretty please, stop using enterpise level architecture for your small/medium sites.

:P

Building the Makerbot - Part 1

Slightly later than promised, here is the first part of my adventures in building the Makerbot! I meant to post this before I went away to the states, but had too much work on.

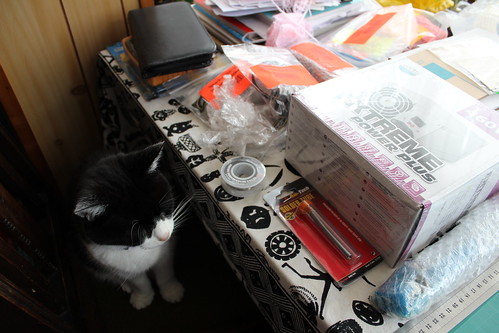
Having bought in a decent desk mounted vice, a new soldering iron and a decent multimeter, I was locked cocked, and ready to rock. Sadly, I couldn't get Pete or Matt over, so I was instead assisted by my trusty feline companion, Suki:

My Able Assistant

To be fair, she didn't do much apart from Purr and try and sit on me when I was doing fiddly stuff, but she did sit there the whole time, so all good.

Having sat down and read through the extensive Makerbot Wiki I have to say I was pretty daunted, its easily the most complicated project I've ever undertaken. First up I had to install all the drivers/software on my laptop, and check that the Arduino board was working. That turned out to be really straightforward, it was just a case of installing some software, and plugging in the board via USB to install the drivers.

Next up I started assembling the parts I needed for the X stage of the printer (the actual print surface). There were three options, the first, a simple wooden platform, the second a simple heated platform, and the last was the all singing, all dancing Automated Build Platform, with is heated, AND has a conveyor belt for ejecting printed objects. Not wanting to pussy out, I went for the third option. Popping out all the wooden parts was pretty simple, although cleaning the burnt residue from the edges of all the parts was pretty time consuming.

Assembling the wooden frame parts is really straightforward, thanks to the clever T-Nut construction. You do it all with allen keys. Its like a really, really geeky Ikea kit :P First part of soldering was attaching wires to the motor for the converyor belt, and that was pretty straightforward too. Building the rollers for the platform proved to be slightly more tricky. If you don't get your measurements exactly right, they end up out of alignment, which is what happened to me, so I had to do some trimming and adding to the rollers until they fit correctly.

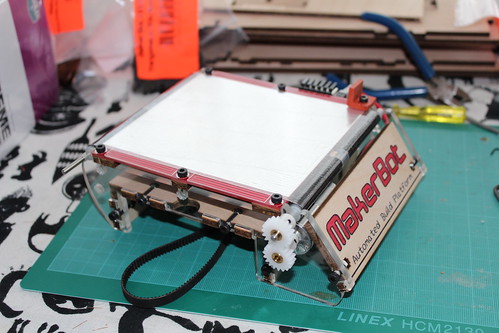
Eventually, after several hours, I ended up with something that vaguely resembled an Automated Build Platform:

Completed Build Platform 3

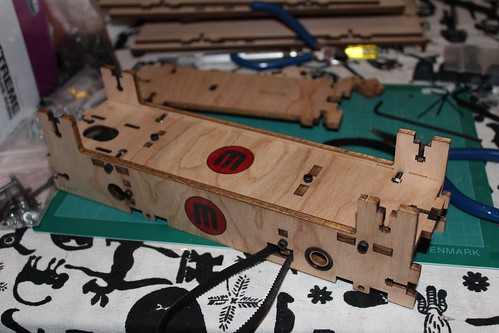
Feeling bouyed by my success, I decided to make a start on the Y assembly, which proved to be even simpler than the X stage to build. Eventually I got most of the way there:

Y Axis Frame

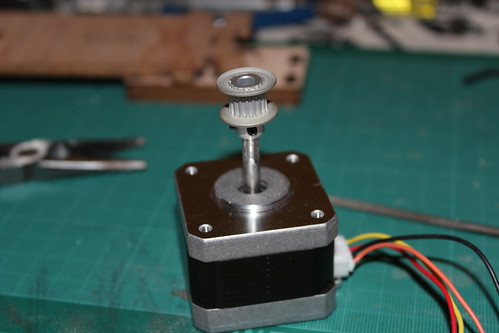
Sadly I ran into an issue with the pulleys. It turned out they didn't fit! The instructions said they might need sanding, but it turned out they were totally the wrong size:

Oh Noes!

A quick email to Makerbot support later, and it transpired that the motors had been upgraded in a recent kit upgrade, but I still had the older pulleys. They sent me out replacements, first class, the same day! Most impressed. That did however mean that I had to call it a day at that point.

You can view the full photo set on my Flikr page, here. More to come soon, once I've uploaded all of the pictures!

Social Media APIs

Recently, I got to work on a project that involved communicating with three of the main Social Media sites. Twitter, Facebook and LinkedIn. The task sounded fairly straightforward, all I needed to do was add a feature to Umbraco to allow you to share a page with one or more accounts on each of those networks.

Not too complicated I think to myself. All three platforms are big, and popular, so there must be decent APIs and SDKs available! So I did the easy parts, set up my config files, event handlers, menu items and dialogs, all good so far. So next up, I sit down to implement the first network.

Twitter
Twitter is the big one. Its effectively a hosted service, with a basic UI, that other people interact with and pipe data to and from. Consequently, their API is fantastic. Its easy to use, extremely well documented, and has more SDKs and libraries in every conceivable language than any other system I've worked with. Consequently it took less than two hours to find a decent SDK (I used the excellent TweetSharp), work out what API calls I needed to make, set up an App in Twitter, authorise it and get it all up an running. Its a great example of a service provider going out of their way to make you want to use their API. Hell, Twitter pretty much stands around on street corners flashing its goodies at you screaming for you to use its API.

Facebook
Next up was Facebook. Another heavy hitter, these guys also have a fairly comprehensive API, lots of documentation, and loads of SDKs and toolkits. The only problem is that they change their API a fair bit, so a lot of the information on the web can be out of date (as well as some of the official documentation). This caused me a bit of pain on a few occasions where I found out I was calling deprecated API methods and so forth. On the whole though, the whole process only took a couple of hours or so longer than Twitter, and some of that was down to Facebook being fussier about setting up Apps. I used the excellent FacebookWeb SDK in the end to do all the grunt work.

LinkedIn
And finally, the new kid in town. These guys have an API, its not bad, but working with it isn't easy, especially if you use .Net. There's only one 3rd party Toolkit, which forces you to inherit from basepages (which wasn't any good for my code), and the documentation is OK, but REALLY badly laid out. In fact I'd go as far as to say it was excruciatingly painful trying to get working code for LinkedIn. As the 3rd party toolkit didn't meet my needs, I ended up rolling my own code based on oAuth and some code I found buried on the support forum. It took me about a day to get it up and running, not helped by the fact that the example in C# I found for updating statuses was out of date.

The difference between the three is quite marked. You can see why everyone and their dog does Twitter integration, it's so EASY. Even Facebook, while slightly fiddlier, doesn't present too much of a challenge for most tasks. But LinkedIn is a nightmare. Things look better if you're a Ruby or PHP  person, as better toolkits are available. But still, if you're going to release an API for your system, here are a few tips that will make us developers like you more, and should hopefully result in better takeup of your system with integrators:

  • Document everything thoroughly, and for God's sake update the docs if the API changes!
  • Have example code in as many of the major languages as possible. Don't have inhouse .Net/TCL/Python folks? Hire a freelancer, or sponsor someone in your dev community to do it. Developers love example code. Also, the updates thing. No one likes going through code examples to find out they don't work because the API was updated and no one updated the examples.
  • Make it easy for us developers to create SDKs/Toolkits for your API. We love doing that, and most of us will share that code with others too!
  • Make you API make sense. If your methods have human readable parameter names, we can figure out whats going on better than having short/obscure/gibberish ones.
  • As above, but for method calls. Make sure they make sense.
  • Don't make us use the API to find out the information we need to use the API. If there's a web interface for your app, give us a way of getting ids etc, don't make us write code who's sole purpose is to get the ids/whatever I need to use your API.

Building a 3D Printer

At Codegarden this year, I was lucky enough to win a Makerbot Thing-o-matic. What's one of those you ask? Its a self build, 3D printer. It is, by far and away, one of the coolest things I've EVER won. Thanks to all who cheered for me during the competition!

The only thing is, it starts off life looking like this:

Makerbot in bits

(The wool isn't part of the kit, its just on my table). Quite a way to go before I can start printing out cool stuff! I've read through the rather comprehensive online Wiki for the device and reckon I've got it mostly worked out. I had to order in a few bits and pieces, I've never owned my own multimeter, and my old soldering iron was dead. Those have now arrived, so over the next few weeks, I'll be blogging about my experiences building this very cool device.

With any luck, I'll be getting some help from Matt Brailsford and Pete "Knife Meme" Duncanson along the way as well. I'll be sure to post plenty of pictures and blog posts.

And yes, one of the first things I intend to print is an Umbraco logo :P If I can get a decent model on the go, I'll also be trying to print out some medals for all of the entrants to the package competition too!